Showing posts with label Entree. Show all posts

Wednesday, February 1, 2012

I'm stealing this!

So, I totally stole this from Rachel. So I must give her the credit. It looked so delicious that I had to make it and show you! Rachel has a printable recipe on her page, so you can hop over there and print this out. *I'm still working on having a "Printable Recipe" page.

We're making Ginger Pork Potstickers a la Guy Fieri! I love his Diners, Drive-ins and Dives but this is my first Guy recipe.

Here's what you need:

1 lb ground pork
1/4 cup onion, finely diced
2 tbsp minced ginger
1 tbsp minced garlic (I use about 2 cloves)
1 tsp soy sauce
1/4 tsp sesame oil
wonton wrappers


Do all your chop choppin! I love to chop, I could chop all day. Alot of folks love those little gadgets that make the chopping faster and some even make it possible to chop something without ever touching it. I'm not a gadget girl, I personally love eau de gahhhlic :)

Brown everything to a lovely brown color :)
You could very easily sub ground turkey or beef or chicken here. The hubs is not a fan of pork so next time I'll probably go with turkey.
Remove from heat and add in your soy sauce, sesame oil and S&P. Sit aside to cool.

OK, get some water to boiling for later. I used a deep sauce pan. But you could use one of those lovely oval pasta pans too.
Now the hubs was starving so I was in a hurry *plus he offered to help* didn't wait as long as I probably should have for the filling to cool BUT I didn't have any problems at all.

You need a small bowl of water and a pastry brush. If you don't have a pastry brush just use your fingers.
You are going to brush the outside 1/2 inch of two perpendicular sides of your wrapper.

Fill your wrapper! I used a tsp and just messed around with how much I could use. Don't overfill!

Fold over and roughly line up the edges. It doesn't have to be perfect.

*The hubs did an excellent job of photo documenting this. You could flip through them and see me moving...lol. As a result you're getting a very thorough wonton wrapper tutorial*


Make sure you squeeze the edges together REALLY good. It's pretty easy for these little boogers to come apart in the boiling water. It really doesn't take long to do this. It seems more in depth than it really is. I set the cutting board up with four at a time and did them like that. *This next part is alot easier with two people. It runs smoother like that. I did the wonton's and the hubs did the boiling. (Yvette, I bet BJ would be an excellent wonton wrapper guy!)

Heat up a small pan with a little of that sesame oil you have. If not, EVOO or canola is fine.
Drop them (a few at a time) into boiling water. You want them to be able to move around so don't over fill your pot. But don't worry because they only stay in the water for one minute then you fish them out. So the process doesn't take long at all. *Remember how the hubs was starving and I was in a hurry? Well I skipped the next step.* You are supposed to let them sit on a cooling rack for a while to dry off a bit. I just let them drain a few seconds and them put them in the pan (I missed the photo!).

Drop them into the hot pan with the sesame oil and let them get a delicious browned color.

Serve with some soy sauce for dipping and you're in business!

I happen to think that if it involves ginger and soy sauce it could be a shoe and I'd love it. BUT, this was really great. The hubs would have liked it better if it wasn't pork but I'm a pork fan. This is pretty versatile too so you could add in some carrots or something and sneak it past the kids. PLUS, who doesn't like to eat with chopsticks?!?! And if you don't have chopsticks, who doesn't like to eat with their fingers?!?!

They are also good even if they aren't steaming hot so it would be a great recipe to take to a party. They warm up better than you would thing, but you could also just save (or freeze) the filling to use for later. This makes a ton of wonton's so ask a friend to come over too.

Thursday, January 12, 2012

Ultimate Leftover Recipe

So the main reason that I make meatballs is so that I can make the Meatball Sub Casserole that comes the next day. I don't usually make the meatballs for this recipe, here's my logic:
I am NOT a fan of leftovers or warming anything up. SO whatever I can do to make the leftovers more fun I am all for it. Since I love this casserole I save that for the leftovers so that I know I'll eat them.
Takes a long way to get there, but it works in my brain!

Here's what you need:

Your leftover meatballs from here
1/3 cup chopped scallions (optional)
1 loaf Italian bread , cut into 1 inch slices
8 ounces cream cheese, softened
1/2 cup mayo
1 teaspoon italian seasoning
1/4 tsp pepper
1 cup shredded cheese (of your choice
1 (28 ounce) jar spaghetti sauce
*if you are feeling extra saucy (tehehe) then you can make your own*

Preheat to 350

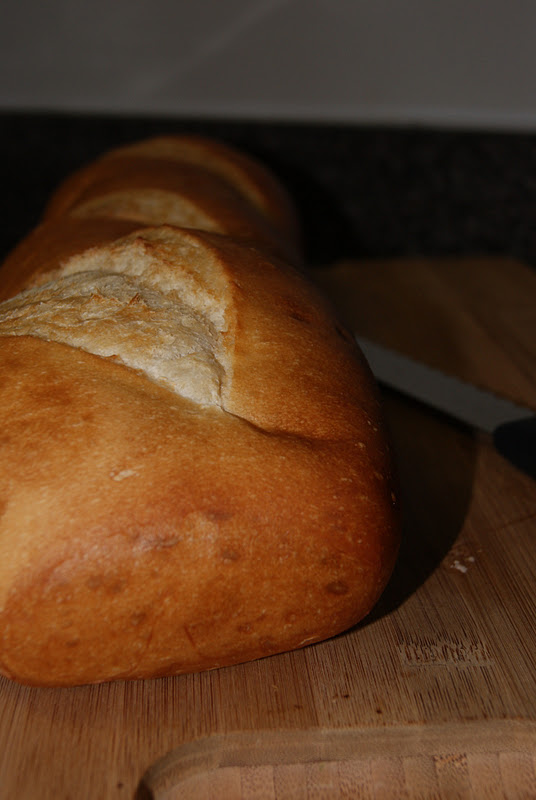
Start with a GOOD loaf of bread. You'll be glad you did. I am a fan of the French Loaf that is in the Bakery at Wal-Mart. It's a tasty, tasty magical thing full of yeasty goodness.

Cube up your delicious bread and line a casserole dish. If you were being super on top of things then you could make two smaller ones and one goes straight to the freezer!

In a bowl goes your mayo, cream cheese and spices. Mix well!

Make sure that your cream cheese is softened. If not the next step will be miserable for you!

Spread the cream cheese mixture over your bread cubes. It should go on rather easily. Sprinkle some of your cheese. I happened to have some Romano, tasty!

Add your meatballs and then

Pour your sauce over the meatballs and add your shredded cheese. I went a little nuts with the cheese but I do love cheese. Bake at 350 for 30-40 minutes. If the meatballs are hot, 30 is fine. If they are leftover meatballs then you might want to go more like 45 minutes.

Serve with Roasted Parmesan Green Beans for a fantastic dinner!

You'll be so happy about this recipe after one taste. You could make it ahead and bake at the last minute and it freezes great!
I guess it's the mayo, cream cheese concoction that makes it so great! It's such a great cold weather comfort food. It's one of my tired and true recipes to make the hubby say, "Wife, you are a GREAT cook!"


Wednesday, January 11, 2012

Why don't we try this?

The hubs likes to find recipes on Saturday mornings before we go out to meander and run errands. Then I think about this new recipe all day!

This weekend was no exception so I bring to you our little version of Bucatini All'Amatriciana with Spicy Smoked Mozzarella Meatballs. I love love love Giada but I very rarely try her recipes, I'm not sure why that is.

Here's what you'll need for our version:

Sauce:
2 tbsp evoo
1 small onion, minced
2 garlic cloves, minced
crushed red pepper flakes (depending on your tongue, less than an 1/8 tsp)
2 cans diced tomatoes
1/2 grated Romano
1/4 cup parsley
cup mushrooms, chopped
s&p to taste

Meatballs:
1 shallot, grated
1/2 cup parsley, chopped
2/3 cup grated parmesan cheese
1/3  cup bread crumbs
1 tbsp dried basil
1 egg
2 tbsp ketchup
3 garlic cloves, minced
1/4 tsp crushed red pepper flakes
2 lbs ground meat, whatever you choose
2 ounces of cubed smoked gouda

Preheat to 400

Let's do the meatballs first.

Grate your shallot and you can go ahead and do the garlic too. The only reason that I didn't is that I forgot!

Chop and add the parsley

Here we have the garlic, egg, spices, ketchup, cheese and bread. Mix it all up into a delicious concoction!

Now, roll them out however you see fit. I rolled them all out. then washed the hands (of course)


and cubed up the gouda.
*Side note, Smoked Gouda is one of my favorite cheeses. It has substance so it can hold up to alot of recipes and it has that delightful smoked flavor. This was the hubs first encounter with smoked gouda and he liked it IN the recipe, but for just a cheese to eat he says that he's not that much of a fan.*


Then made an indent (like above) in each meatball and add the cube of cheese. Base your cube size on how big your meatball is. It's a preference. Then you just sort of re-shape the meatball around the cheese, like so:

We wanted to put these on the grill but it didn't really work out for us, so into the oven they went

For about 15 minutes or so. I might have done 17 on this batch because they were a little bigger than I usually roll out.

NOW, for the sauce:

Get your garlic and

onions chopped and going in the pan with some evoo.
*Side note, see that Dark Chocolate bar in the background? There is always, always one sitting right there by the cutting board. It's the hubs super secret powers. He picks at it as his after work snack.*

Get some lovely and tasty carmelization going on here.

Add in all your lovelies, the tomatoes, mushrooms, parsley and simmer for a bit. Then in the last 15ish minutes add in the Romano cheese. This will thicken it up quite a bit.

You can add in the meatballs and let them simmer for a while. I didn't do that because I had BIG BIG leftover plans for them. Serve over the pasta of your choice!


This was really great. It was spicy enough to be interesting but not so much that I had to stop eating it. The meatballs were rather delicious and the smoked gouda added something special. The Romano in the sauce was just right. I think next time I might work some basil into the sauce somehow. I just think that having tomato without basil is silly.
There are plenty of meatballs here to freeze them or use them in a leftover, or both.
This, I believe will be added to my pile of fall backs.


Saturday, January 7, 2012

Let's Dutch Oven this thing

So I wanted to find a recipe that used as many new Christmas kitchen items as possible so I found this fantastic PW recipe for Beef Stew with Mushrooms.

This is my first time using a dutch oven. I've wanted one for a while but I never really thought about what I would make with this contraption. I was a bit skeptical because you cook on high (which the hubs loves but doesn't quite understand) and because I'm generally not a fan of anything that isn't dishwasher safe.

I've got to tell you, I believe I'm a fan of the dutch oven. I still want to try a few more recipes to get a better feel for it but so far, so good. It washes up quite brilliantly. The dutch oven that I have is enameled so I can use soap whereas I couldn't with a straight cast iron one.

OK, here's what you need:

2 lbs (ish) sirloin meat, cubed
2 tbsp flour
4 tbsp butter
2 tbsp evoo
2 shallots, grated
5 cloves garlic, grated
1 8 ounce package mushrooms, sliced
1/2 cup red wine (I used Shiraz)
1 can beef consomme
2 sprigs thyme
cooked pasta


Try to get the meat all the same size. You can find "stew meat" in the grocery store already cubed. While your butter and evoo are heating in the dutch oven, add the flour to the meat and toss well.


Over high heat sear the meat. You'll want to do this in batches so that the meat has room to move around. Just a quick sear is all you want here, you'll finish the cooking process later.

I love shallots. If you haven't used them before, give them a try. They have a lovely onion flavor but it's different enough for them to have their own distinction. If you don't like them or maybe can't find one you can easily sub a small onion here.

I wanted the flavor to float around all lovely and evenly so I choose to grate the shallot and garlic. It only takes a second more. If you have someone that doesn't like the idea of garlic or onion you can slip it by them this way!

Reduce the heat to medium highish.
Leave all those beautiful brown bits on the bottom of the pan. Add your grated mixture. It comes out to this paste consistency. Stir those around for a couple of minutes then add the mushrooms.

I choose to use sliced mushrooms, small whole mushrooms would be good too. I am using baby bella's here.

Add your consomme and wine. I added a half can of water too. Bring to boil then add salt and pepper to taste.

Add your meat back in along with all those lovely juices that have collected in the plate.
Reduce to simmer and add thyme.
Cover and simmer for 45 minutes.
Add 2 tbsp of flour and let thicken.


I served this over whole wheat pasta I made. (I haven't perfected the pasta making yet, when I do I'll show you).

This was fantastic. The meat was so tender. The gravy/sauce was so tasty. If you're feeling a bit skeptical about adding the wine, you can't taste it at all. It helps break down the meat and helps it to be so tender.
This would be good served over rice, but I think next time I make this I'll put it over mashed potatoes. That would be really good. The potatoes would soak up all the goodness.

This goes in the good stack!


Thursday, November 17, 2011

You need this in your life!

Oh boy! I cannot wait for you to read and try this. God Bless Pinterest!

I had a Butternut Squash that I had to do something with and pinterest was up to the job!

So here's what we're going to make (We as in you too!) You need it, no kidding!

Roasted Butternut Squash Ravioli with Sage Brown Butter Sauce!
This sounds fancy schmancy, but it is so easy! If you take this to an event you will be hailed a hero and master chef (that's what I'm going for anyway).

Here's what you need:
1 butternut squash
olive oil
1/2 cup parmesean
1/2 tsp nutmeg
pasta dough (don't freak out, it's easy and the recipe is below, seriously stick with me here)
2 tbsp ground sage (or about 12 sage leaves)
1 stick of butter (channel Paula)

OK, let's get started!
PreHeat to 425 degrees!

This is the hardest part folks. Take your peeler and peel the squash.

Cut in half and scoop out the stuffin's!

Cube the squash, try to keep with a consistant size. Drizzle with EVOO and a little S&P. Another requirement is to rock out on your pink iPhone to Pandora!

Cook for 25 minutes!

Oh, what a great color!

Add the nutmeg, parmesean and S&P. The Squash is tender enough that just stirring will make the squash the consistency of mashed potatoes.

Your filling is ready!

Now to the pasta dough, here's what you need:

2 cups flour
3 eggs

That's it, for real!

Flour

I added the eggs one at a time. You will have to mix and using a spoon push the flour into the mixture. Mix until the dough has formed a ball:

Amazingly quick and easy!

I don't have a pasta roller (yet) so I just rolled out the dough. Get it as think as you can without having holes in the dough.

With a biscuit cutter cut a cute little circle. Add a little squash and brush with a little water on the edge of the circle.


Pinch around the edge to secure. I started with these half circles but changed to having a piece of dough, squash and a piece of dough on top. I liked those better. Still the same concept.

In the mean time, in a pan add your sage and stick of butter and melt. You want the butter to turn to a beautiful shade of brown.


Now that you have your ravioli, drop into boiling water. Be sure your water is salted. It only takes between 2 and 3 minutes for the ravioli to be done. When the ravioli pops to the surface, it's done.

From the pot, but your ravioli into the pan with the brown butter sage sauce.

That's IT! It's really easier than you think! AND SOOOOO delicious!

You could easily use this as an entree and be fully satisfied. We made it a side item!

It was just as good as it looks.
I am so excited about making my own ravioli.

Here's what you do to freeze it. Make the pasta, don't cook it!
Lightly flour the biggest sized cookie sheet that will fit in your freezer and line up your ravioli on the cookie sheet. Once the pasta is frozen you can stack them in a freezer safe bowl and they won't stick together. Just take them out of the freezer, put them in boiling water for about 3 - 5 minutes. What a great, easy, quick dinner for those nights where you're in a hurry!

Try it, tell me how it was!