Showing posts with label Make Ahead. Show all posts

Monday, February 13, 2012

How YOU doin?!

Hey guys!
I am super sorry about being totally absent. I've been feeling a bit down and have not been in the kitchen at all. But I'm feeling a bit better now and being in the kitchen makes me feel better so I'm just feeding (tehehe) off of it all today.
Anywho, I've been trying to exercise and eat better lately so I have a few recipes that are low cal and maybe you can also replace your snacks with something more filling but with less calories.

I've already confessed my love for all things pinterest and this one is all over the place there.

Here's what you'll need for some kale chips:

bunch of kale
evoo
s&p
whatever flavoring you like* I used cheese, you can use any kind really. Or maybe you're feeling a bit sea worthy you could do old bay or maybe some italian or really anything. Your imagination's the limit.

Preheat to 350


I happen to love kale. It's so robust and filling. It has a great flavor and takes to alot of things. I love it in soup it does a great job of adding some substance to it

*Let me explain this picture. I was by myself but I wanted to be able to show you how to rip the kale off. It didn't work out too well for me.*
Despite the terrible picture, you hold the stalk. Start at the bottom of the leaves and pull upwards. The kale just pulls away from the stalk super easily, it's quick work. I then tore the pieces into bite sized/finger food sized pieces.

On a greased baking sheet drizzle the kale with a bit of EVOO. Just enough to lightly coat. Add your topping of choice. I had some outrageously delicious Jalepeno and Habanero Cheese. It is so great but it's insanely hot (obviously) so I can only eat about a rice sized piece at a time. I thought that maybe doing this could infuse that great flavor but ease off on the heat. Add your s&p. I choose coarse sea salt and I'm glad I did. You don't need a ton of it but it imparts great flavor.
Bake for 12-14 minutes.

The kale will be super crispy and light.

These are so good. You just pick at it like popcorn. The flavor is so fresh! I'm so glad that I picked that 8th dimension of hell cheese because it added just enough of everything to make it over the top. At 43 calories for a cup, you can eat this stuff all day long for about 97 calories. It satifies my salty craving!

Saturday, January 21, 2012

Outside the box

The hubs loves pop tarts. He doesn't care what flavor, he loves them all. I've never been able to eat them, the pop tarts and I don't get along.

He likes to take them in his cute little spider man very manly lunchbox for breakfast. I found some a while back on pinterest and ask him did he want me to try to make them, he resisted!

A week or so ago he came up with the idea all on his on remembered and asked if I'd try the homemade pop tarts. They were so good that I'm perturbed with him for resisting.

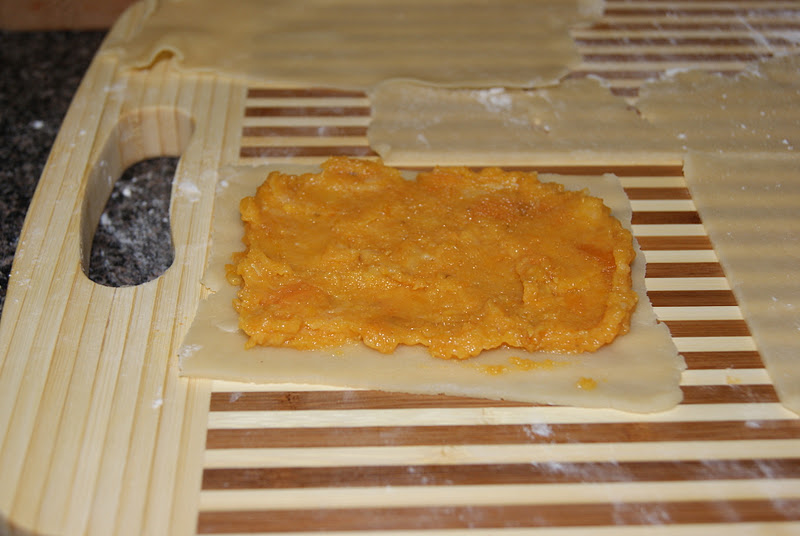
He decided he wanted the filling to be sweet potato so I just made a Sweet Potato Souffle to use for the filling. Just make it just like the recipe.

Now, let's make the dough. This dough is outrageous. It is so good and without a doubt the easiest dough that I've ever worked with. It's super pliable and does exactly what you tell it to.

Here's what you need:

2 cups all purpose flour
1 tbsp sugar
1tsp salt
1 cup butter, cut into pea(ish) size
1 egg
2 tbsp milk

Preheat to 350


Ok, normally I use the mixer for dough. That was until I got a processor. The food processor makes dough so much easier. Anywho, the flour

Sugar and salt. Get those combined well and then add your

butter. Mix well. The butter should make it look like a wee bit lumpy.

Beat the eggs and milk together just until mixed and then add to the flour mixture.

Then let the mixer or food processor do the work for you until you have a dough as beautiful as this

I'm telling you it's like working with something as easy as play-doh.

Take a little baseball(ish) size ball and roll it until it's flat. Not like rolled out like you would pastry, just enough to get it through the roller!

*Quick, very quick pasta roller tut*
Pass the dough through on level 1.

Fold it over itself

and pass back through on level 1. Do this several times until it goes through easily. The dough completely changes consistency. You'll be able to tell when it's ready to go up to level 2

Repeat the process of folding over and passing back through the machine on level 2. For this level 2 is as high as I went, then back to the cutting board.

I just did a tiny bit of rolling with the rolling pin to make it a bit wider.

Figure out the size you want and cut out your squares. Put a layer of your filling down leaving about a 1/4 to 1/2 inch empty around all four edges.

Lay a dough blanket

Cut the extra and press down the edges.

Using a fork go around the edges to seal it all in nice and tidy.
Bake for 15 minutes.
  
The glaze that I used (and am still working on) is a Marshmellow Creme Glaze. It's delicious. This is my first experience with Marshmellow Creme.
1/3 cup sugar + 3 tbsp of water in the microwave for about a minute (until it boils). Add in 2 tbsp of Marshmellow Creme and stir until it's all melty and delightful.
Add your glaze *and sprinkles if you see fit*

If you are eating these right away add your glaze and have at it.

If however you are going to be taking these in your spidey lunchbox we have another method.

You can put the glaze on before you bake them and it will bake into the poptart and be a little more travel friendly, or, if you are my hubs...you break out the kitchen torch!

*Sorry, I was in charge of this picture!*

It puts a lovely carmelization on the glaze and makes it less sticky than just leaving it.

Either way you get this

I really cannot explain to you how great this is. The dough is outstanding. Just a little sweet, it is substantial enough to be a one-hander. It has just a little crunch. The sweet potato was a great idea and I'm currently in love with marshmellow creme.
It's not too sweet, it stands on it's on and it blows those boxed pop tarts out of the water.

My plan is to make these and freeze the one's that he won't eat this week and take them out as needed!


Thursday, January 12, 2012

Ultimate Leftover Recipe

So the main reason that I make meatballs is so that I can make the Meatball Sub Casserole that comes the next day. I don't usually make the meatballs for this recipe, here's my logic:
I am NOT a fan of leftovers or warming anything up. SO whatever I can do to make the leftovers more fun I am all for it. Since I love this casserole I save that for the leftovers so that I know I'll eat them.
Takes a long way to get there, but it works in my brain!

Here's what you need:

Your leftover meatballs from here
1/3 cup chopped scallions (optional)
1 loaf Italian bread , cut into 1 inch slices
8 ounces cream cheese, softened
1/2 cup mayo
1 teaspoon italian seasoning
1/4 tsp pepper
1 cup shredded cheese (of your choice
1 (28 ounce) jar spaghetti sauce
*if you are feeling extra saucy (tehehe) then you can make your own*

Preheat to 350

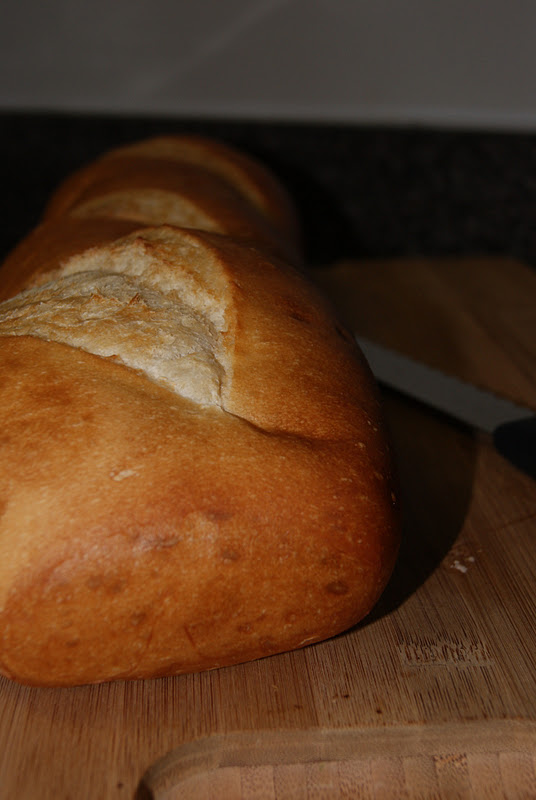
Start with a GOOD loaf of bread. You'll be glad you did. I am a fan of the French Loaf that is in the Bakery at Wal-Mart. It's a tasty, tasty magical thing full of yeasty goodness.

Cube up your delicious bread and line a casserole dish. If you were being super on top of things then you could make two smaller ones and one goes straight to the freezer!

In a bowl goes your mayo, cream cheese and spices. Mix well!

Make sure that your cream cheese is softened. If not the next step will be miserable for you!

Spread the cream cheese mixture over your bread cubes. It should go on rather easily. Sprinkle some of your cheese. I happened to have some Romano, tasty!

Add your meatballs and then

Pour your sauce over the meatballs and add your shredded cheese. I went a little nuts with the cheese but I do love cheese. Bake at 350 for 30-40 minutes. If the meatballs are hot, 30 is fine. If they are leftover meatballs then you might want to go more like 45 minutes.

Serve with Roasted Parmesan Green Beans for a fantastic dinner!

You'll be so happy about this recipe after one taste. You could make it ahead and bake at the last minute and it freezes great!
I guess it's the mayo, cream cheese concoction that makes it so great! It's such a great cold weather comfort food. It's one of my tired and true recipes to make the hubby say, "Wife, you are a GREAT cook!"


Monday, November 28, 2011

This.is.serious.


Very, very serious!
The following post is my secret weapon.
I have about 3 secret weapons, this is the most closely guarded.

My secret weapon is Molasses Cookies.

They are loved by all, even if you don't know it yet...you love these cookies.
It's very important to follow the directions just as they say. If you leave out anything they don't come out just so. They are not hard, just specific. Ok, you ready??

Molasses Crinkle Cookies
1 cup very soft butter
1 cup packed brown sugar
1 egg
1/4 cup your choice molasses*
1/2 cup dry milk powder
2 tsp baking soda
1/4 tsp salt
1/2 tsp ground cloves
1 tsp cinnamon
1 tsp ginger
2 1/2 cup all purpose flour

*You may not be a health food store freak like me, so let me explain. There are a ton of different kinds of molasses. Molasses are GREAT for you. For me, when my iron is low I try to add a bit of molasses to my diet. I like molasses milk instead of chocolate milk! ANYWHO, use the molasses you like! It's amazing how very different the cookies taste with different types of molasses. If you are new to molasses I suggest you just use a random variety from the grocery (Like Karo would be fine). If you are a molasses pro, go with the blackstrap molasses. Your cookies will be SOOO moist and rich! But I think if you're not used to the rich, thick blackstrap molasses it might be shocking for you.*


Let's get started!

Cream the butter and brown sugar until it's smooth. The softer the butter the easier this will be.

Just beat until well incorporated.

I always have dry milk powder at home. I have found no other use for it than the cookies!

Add your dry milk, egg and molasses. Mix those well.

Add your baking soda, salt and spices. Then add your flour a little at a time. Dough should be very stiff.

Now, put the dough in the fridge for at least 20 minutes. Longer would be better. You want this dough super cold. If you try to roll out the dough before it's cold, you will regret it.

See the difference? It is so easy after the dough is cold.
Here's what you do:

Spoon out some dough and roll into a ball. I took these cookies to a gathering, so I went with a teaspoon of dough for easy pick up. They are beautiful cookies, they always come out looking perfect and not all crazy shaped.

You roll the cookies in granulated sugar.

Then place about 2 inches apart on your sprayed cookie sheet!

Put a drop of water on each cookie. Here's what I do, I put my finger in water and just put a little indent in the cookie. It makes them come out perfectly shaped. Not alot of water here, just a drop.
Bake at 375 for 10-12 minutes!

MMMM, sooo good!
They are truly delicious!
They are what the hubs wanted after Basic!


Molasses Crinkle Cookies
1 cup very soft butter
1 cup packed brown sugar
1 egg
1/4 cup your choice molasses*
1/2 cup dry milk powder
2 tsp baking soda
1/4 tsp salt
1/2 tsp ground cloves
1 tsp cinnamon
1 tsp ginger
2 1/2 cup all purpose flour

Preheat to 375˚

Cream the butter and brown sugar.
Add dry milk, egg and molasses, mix well.
Add baking soda, salt and spices. Add flour gradually.
Beat until it has a dough like consistency.
Put dough in the fridge for at least 20 minutes.
Spoon out dough and roll into a ball and then roll in granulated sugar until coated.
Put on cookie sheet and add a drop of water on each cookie.
Bake for 10-12 minutes.

Thursday, November 17, 2011

You need this in your life!

Oh boy! I cannot wait for you to read and try this. God Bless Pinterest!

I had a Butternut Squash that I had to do something with and pinterest was up to the job!

So here's what we're going to make (We as in you too!) You need it, no kidding!

Roasted Butternut Squash Ravioli with Sage Brown Butter Sauce!
This sounds fancy schmancy, but it is so easy! If you take this to an event you will be hailed a hero and master chef (that's what I'm going for anyway).

Here's what you need:
1 butternut squash
olive oil
1/2 cup parmesean
1/2 tsp nutmeg
pasta dough (don't freak out, it's easy and the recipe is below, seriously stick with me here)
2 tbsp ground sage (or about 12 sage leaves)
1 stick of butter (channel Paula)

OK, let's get started!
PreHeat to 425 degrees!

This is the hardest part folks. Take your peeler and peel the squash.

Cut in half and scoop out the stuffin's!

Cube the squash, try to keep with a consistant size. Drizzle with EVOO and a little S&P. Another requirement is to rock out on your pink iPhone to Pandora!

Cook for 25 minutes!

Oh, what a great color!

Add the nutmeg, parmesean and S&P. The Squash is tender enough that just stirring will make the squash the consistency of mashed potatoes.

Your filling is ready!

Now to the pasta dough, here's what you need:

2 cups flour
3 eggs

That's it, for real!

Flour

I added the eggs one at a time. You will have to mix and using a spoon push the flour into the mixture. Mix until the dough has formed a ball:

Amazingly quick and easy!

I don't have a pasta roller (yet) so I just rolled out the dough. Get it as think as you can without having holes in the dough.

With a biscuit cutter cut a cute little circle. Add a little squash and brush with a little water on the edge of the circle.


Pinch around the edge to secure. I started with these half circles but changed to having a piece of dough, squash and a piece of dough on top. I liked those better. Still the same concept.

In the mean time, in a pan add your sage and stick of butter and melt. You want the butter to turn to a beautiful shade of brown.


Now that you have your ravioli, drop into boiling water. Be sure your water is salted. It only takes between 2 and 3 minutes for the ravioli to be done. When the ravioli pops to the surface, it's done.

From the pot, but your ravioli into the pan with the brown butter sage sauce.

That's IT! It's really easier than you think! AND SOOOOO delicious!

You could easily use this as an entree and be fully satisfied. We made it a side item!

It was just as good as it looks.
I am so excited about making my own ravioli.

Here's what you do to freeze it. Make the pasta, don't cook it!
Lightly flour the biggest sized cookie sheet that will fit in your freezer and line up your ravioli on the cookie sheet. Once the pasta is frozen you can stack them in a freezer safe bowl and they won't stick together. Just take them out of the freezer, put them in boiling water for about 3 - 5 minutes. What a great, easy, quick dinner for those nights where you're in a hurry!

Try it, tell me how it was!